.png)
Table of Contents
- Picking the Best Location for Your Coop
- How Level Does the Ground Really Need to Be?
- A Quick Clarification: Coop Base vs. Run or Surrounding Area
- Ground Prep Options: What to Put Under Your Chicken Coop
- Planning Ahead Before Your Coop Arrives
- Final Thoughts: Set the Foundation for Long Term Success
- FAQs
If you are getting ready for a chicken coop to arrive, you are likely thinking about where it will go and how to set everything up correctly from the start. Learning how to prepare the ground for a chicken coop is one of the most important steps in that process, even though it often gets overlooked in the excitement of bringing a coop home.
It is completely normal for ground prep to take a back seat when you are excited to get a new coop set up and ready for chickens. But that excitement can fade quickly if muddy entrances, standing water, or cleaning that feels harder than it should show up because the base was not properly planned. With the right preparation done ahead of time, these frustrations are easy to avoid.
This guide walks through the key steps we recommend before your coop arrives, including choosing the right location, how level the ground needs to be, and which base options work best for different yards and climates. Whether you are installing one of our coops or preparing for another style, the goal is the same: start with a foundation that supports the coop and makes daily care easier.
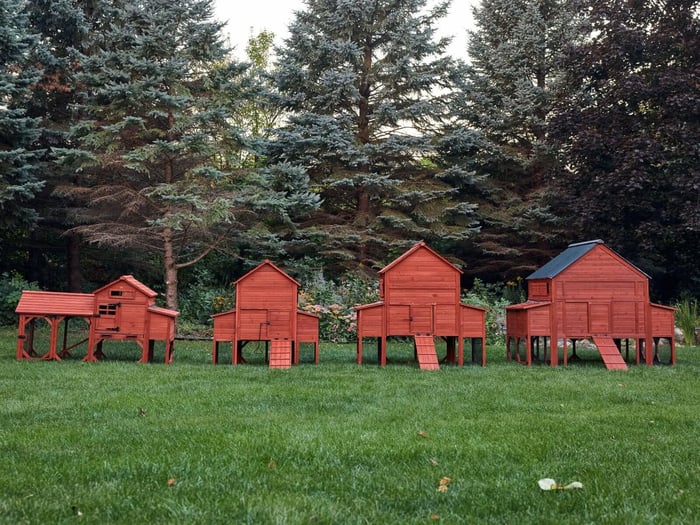
Picking the Best Location for Your Coop
Before you prepare the ground for a chicken coop, choosing the right location is the most important first step. The right spot solves half the problems automatically!
Sun and Shade Balance
Chickens do best with a mix of sun and shade. Morning sun helps dry out overnight moisture and encourages egg laying, while afternoon shade prevents overheating in warmer months.
A good rule of thumb is to place your coop where it gets morning sun and afternoon shade if possible. If you live in a hot climate, prioritize shade. If you live in a cold or damp area, prioritize sun exposure.
Drainage Comes First
Proper drainage is a key part of how you prepare the ground for a chicken coop, especially in rainy or snowy climates. Always choose the highest naturally draining spot in your yard. Water moves downhill, and you want it moving away from the coop, not toward it.
Avoid low spots, swales, or areas where puddles linger after rain. If you are unsure, watch your yard after a heavy storm and see where water collects.
Airflow Without Being Windy
Good airflow helps keep moisture down inside the coop, but constant strong wind can stress chickens and lower winter comfort.
Aim for an open area with natural airflow that is protected from direct prevailing winds by a fence, building, or tree line. If you do live in a windy area, consider putting the coop near a wind block, or adding storm panels to give them a space to get away from the wind.
Convenience Matters More Than You Think
Your future self will thank you for placing the coop somewhere easy to access year round. Here you need to consider those day-to-day tasks like hauling feed, collecting eggs, cleaning, or even winter chores like snow removal.
A coop tucked far away behind trees may look charming, but it often becomes a chore. A visible, accessible location usually leads to better care and easier maintenance.
How Level Does the Ground Really Need to Be?
One of the biggest mistakes people make when they prepare the ground for a chicken coop is underestimating how level the base needs to be.
Your ground does not need to be perfectly level like a concrete slab, but it does need to be consistently level across the footprint of the coop.
What Level Means in Practical Terms
A difference of less than one inch across the entire base is ideal. Up to one and a half inches can often be adjusted during setup, depending on the coop design. Anything more than that increases the risk of twisting, settling, and door alignment issues over time.
If you place a long level or straight board across the area and the bubble stays close to center, you are in good shape.
Easy Ways to Level the Ground
You do not need heavy machinery for most backyard installs.
Remove sod or grass first so you are working with bare soil
Use a flat shovel or garden rake to shave down high spots
Fill low spots with compacted soil or crushed stone
Tamp the area firmly using a hand tamper or the flat side of a shovel
Check level in multiple directions, not just front to back
Take your time here. A well leveled base makes the rest of the install far easier.
A Quick Clarification: Coop Base vs. Run or Surrounding Area
Before diving into ground prep options, it is important to clarify what this section covers. Everything below is focused on how to prepare the ground for a chicken coop itself, meaning the footprint where the coop will physically sit.
The area around the coop, including walkways and runs, has much more flexibility. Materials like wood chips, mulch, sand, or other natural coverings can work well there because they are not supporting the full weight of the coop. These materials are often used to manage mud, improve drainage in high traffic areas, and make cleaning easier, but they should not replace a properly prepared base under the coop itself.
When you prepare the ground for a chicken coop, think of it in two parts:
The coop base, which needs a firm, level foundation
The surrounding area or run, which can use softer or more flexible materials depending on your goals and climate
Keeping this distinction in mind helps you choose the right materials in the right places and avoids common setup issues down the road.
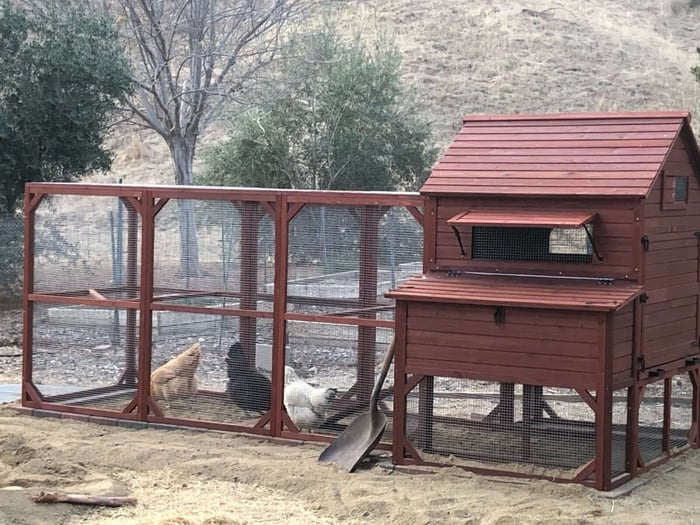
Ground Prep Options: What to Put Under Your Chicken Coop
When deciding what to put down for the base layer of your coop, there is no "best" option out there. Ground prep depends entirely on your climate, soil type, and how permanent your setup will be.
Below is a breakdown of the most common ways to prepare the ground for a chicken coop, including the pros and cons of each option and when they work best.
Grass or Native Dirt
This is the most basic option and often the easiest place to start. If the ground is level and naturally firm, placing the coop directly on grass or compacted native dirt can work. Just keep in mind that grass will die underneath the coop and bare soil can turn muddy without proper drainage.
Pros
Low cost
Quick set-up
Natural look
Cons
Turns muddy in wet weather
Grass dies quickly under the coop
Can become uneven as soil settles
Best Use Case
Dry climates with sandy soil, temporary setups, or very small coops that can be moved regularly.
For most customers, grass or dirt alone is not ideal for long term use.
Gravel Base
Pros
Excellent drainage
Reduces mud and standing water
Easy to hose down or rake clean
Creates a stable, level foundation
Cons
Higher upfront effort
Requires edging or framing to contain gravel
Can be uncomfortable for chickens if standing on it without bedding
Best Use Case
Rainy climates, permanent coop installs, heavy coops, and customers who want low maintenance long term.
For many of our coop customers, a compacted gravel base provides the best balance of durability and drainage.
Sand
Sand is often used inside runs or under coops, but it has limitations.
Pros
Drains better than dirt
Easy to rake and clean
Soft underfoot for chickens
Cons
Can shift and erode over time
Requires regular leveling
Not ideal for supporting heavy coop weight
Best Use Case
Inside covered runs, dry climates, or layered on top of gravel rather than used alone. Sand works best as a top layer, but not a structural base if you live in a wet climate.
Pavers, Bricks, or Concrete Pads
This is the most structured option and also the most work. Although it will be a longer set-up, it provides an extremely level and durable foundation for a chicken coop.
Pros
Extremely level and stable
Easy to clean and disinfect
Prevents burrowing predators
Long lifespan
Cons
Higher cost
Labor intensive
Permanent placement
Can hold moisture if not sloped properly
Best Use Case
If you are weighing a few different base options, pavers, bricks, or concrete blocks are often the most reliable choice. They are especially well suited for urban backyards, predator-heavy areas, or uneven ground where a fully permanent, level foundation makes day-to-day care easier. This option works best for coops that will stay in one place long term and for owners who want maximum stability, simpler cleaning, and added protection against digging predators—while still recognizing that other base types can work well in the right setting.
Planning Ahead Before Your Coop Arrives
One of the biggest mistakes customers make is waiting until delivery day to think about ground prep. That often leads to rushed decisions or temporary fixes.
If you prep the ground ahead of time:
Setup is faster
Adjustments are easier
You avoid moving a fully assembled coop later
Chickens can move in immediately
Measure the footprint of your coop, add a few inches on all sides, and prepare that area fully before delivery.
Final Thoughts: Set the Foundation for Long Term Success
Preparing the ground for a chicken coop is not about perfection. It is about creating a stable, dry, and easy to maintain foundation that supports both your coop and your daily routine.
A little extra effort up front saves years of frustration later. Whether you choose gravel, sand, pavers, or a combination, the key is thoughtful planning based on your environment and how you want your flock setup to function.
When the ground is right, everything else becomes easier.
FAQs
How early should I prepare the ground before my coop arrives?
Ideally one to two weeks before delivery. This allows time for leveling, compacting, and any drainage adjustments to settle.
Can I put a chicken coop directly on grass?
You can, but grass will die quickly and mud often becomes an issue. For the coop base itself, most long term setups benefit from added drainage support. Grass or natural ground is better suited for areas around the coop rather than directly underneath it.
What type of gravel works best under a chicken coop?
Crushed stone or crushed gravel works best for a coop base because it compacts tightly and creates a stable, well draining foundation. Rounded gravel, like pea gravel, tends to shift and does not provide the same level of support.
Do I need landscape fabric under a gravel coop base?
Landscape fabric is strongly recommended under gravel. It helps keep soil from mixing into the gravel, maintains drainage over time, and reduces settling, which helps keep the coop level.
What if my yard slopes slightly where I want to place the coop?
If the slope is minor, you can build up the low side using compacted gravel or soil rather than digging down the high side. The goal is to create a level, stable base for the coop while allowing water to drain away naturally.